Mitring is the cutting process used to join two objects together neatly on an external angle or corner – in this case skirting board.
We get lots of questions asking how to mitre skirting boards and in fact this is one of the simplest joins used to fit skirting boards, so DIY-ers should not be put off. In this guide we are going to cover what tools you will need and explain step by step how cut a mitre joint.
What is a mitre joint?
A mitre is a cut made on an angle. When fitting skirting board on a simple 90° external corner (the ideal scenario) a mitre cut is made at 45° degrees on one of the adjoining pieces, and reflected onto the second adjoining piece, allowing the two pieces to meet at the same 45° angle as above.
This is simple enough, however walls aren’t always square, which complicates the process, and may mean you need to find the angle before mitring. If this is the case for you read our article on how to find your mitre angle after reading this article.
What is an External Angle/Corner?
An external corner will point out from the wall towards you. The walls travel away from the protruding corner. Skirting is fixed around the outside of an external angle, whereas on an internal angle it is fixed around the inside of the angle. A mitre join should be used only on external corners. A scribe joint is used for internal corners.
Tool List
|
Skirting Board |
|
Tape Measure |
|
Mitre Saw |
|
Combination Square - very useful for marking |
|
Sand Paper |
|
Mitremate adhesive |
Step 1 - Clear the area
Make sure there is no debris in the area you will be installing the boards. should there be debris under a board while measuring or marking it can give you an inaccurate measurement when marking. This may then impact on how neat your join ends up.
Step 2 - Measuring out the skirting board and marking
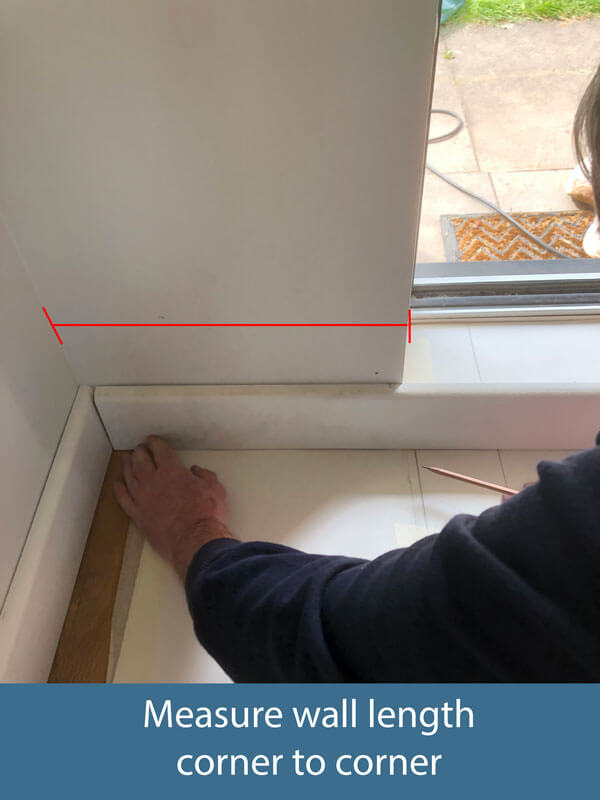
This is simple. First you need to measure the length of wall you need to cover from corner to corner e.g. 1000mm/1m.
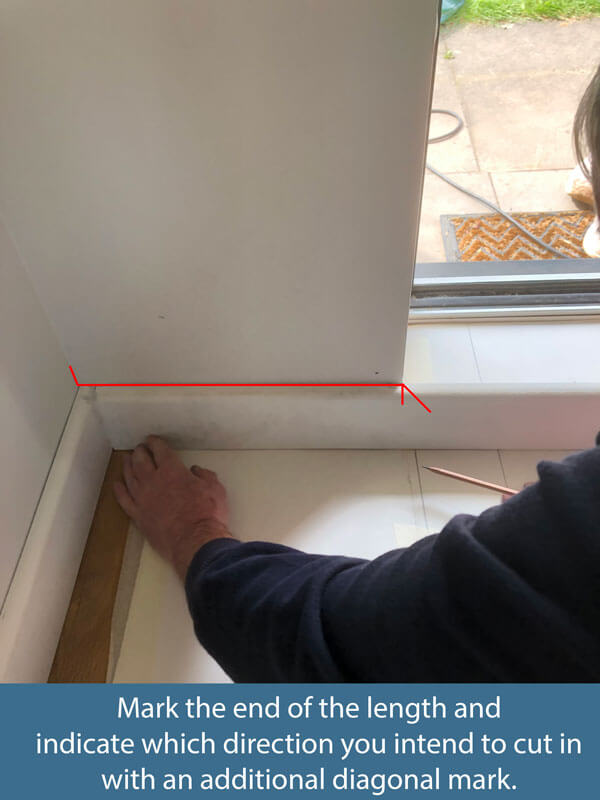
Mark this length on your board, and add a diagonal mark to indicate the direction you intend to cut the mitre in.
Step 3 - Making the Cut
Cutting the Mitre with a Mitre Saw
Position the skirting board on the bed of the mitre saw face up.
Adjust the angle of the saw head to the 45° position so it will be cutting in line with the diagonal direction marking you made above. You are aiming to cut down to where your two marks intersect for the perfect cut. It can be easier to over cut this length and then trim the end off as neccessary.
Tip: Try and keep the pieces you use place on the saw positioned the same way e.g. if you cut the boards face up with the mould at the front of the saw (like in the picture) do this for all of them - dont start putting the mould at the back of the saw as the cut will be wrong. This will help prevent you getting mixed up with what angle you are cutting on.
Tip: Place the skirting board face up with the mould nearest the sawblade. This prevents chipping/breakout on the front of the board.
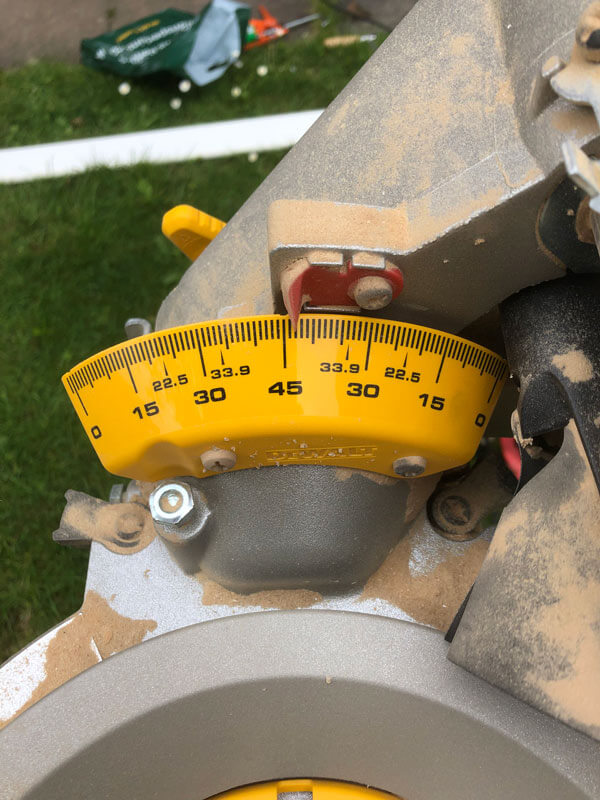
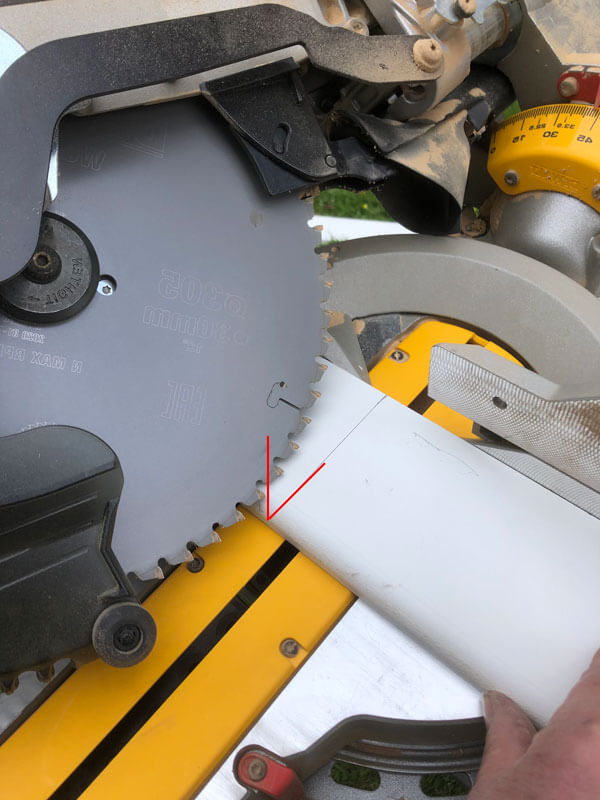
Tip: when you raise the blade of the saw it can graze the edge of you skirting board (pictured below) which can make your cut inaccurate. Pull the skirting board away from the blade before raising the blade.
You now have one half of your mitred corner. Repeat steps 2 and 3 for the second side of your corner but remember to switch your mitre saw head to the opposite 45° position so the cut is reflected rather than parallel with your first piece!
Step 4 - Offer up the boards
Now you have two correctly mitred pieces of skirting, offer them up to the wall together to check for fit. If there is any discrepency it is worth giving the cut end a rub with some sand paper to level it up and remove any debris that may be holding the pieces apart. It is also worth noting that if the wall plaster isnt square this can interfere with the angle by pushing the board off the wall, so it may be worth removing some of the plaster behind the skirting board (we had to remove plaster in this example).
Also remember that the work you carry out will also need to be filled/caulked and decorated, which will address any imperfections and gaps in joins. It will be impossible to get every cut exactly bang on due to aforementioned reasons, and the filler will hide a multitude of sins.
.jpg)
Step 5 - Fix the Skirting Board in place
Once happy with the fit you can now fix in place either using adhesive or conventional methods like screws or nails. If your not sure how best to do this read our article on how to fix skirting boards.
Summary
Congratulations. if you have completed these steps you should have a smartly mitred skirting board joint on your external corner.
The key takeaway for success in this article would be to make sure your markings are correct (check twice, cut once as they say), and to double check your saw angle and piece position when cutting.
Hopefully this guide has helped you succeed and offered some useful insights to DIY-ers.




.png)

